
The video examples uploaded to Youtube and Vimeo were edited with Cyberlink Powerdirector Ultra and were enhanced using the stabilization utility to remove some of the jitteryness caused by the helmet mount as noted below. I am very pleased with the quality of the video and the features of the camera for the various available settings. It also includes flexibility by turning off the GPS. The settings are controlled through the provided Storyteller application and will need to be set before leaving home, but it has two selection switch that allows the user to setup two different modes for quality and for type, such as, a still picture mode.
Uploaded to Youtube
Uploaded to Vimeo
Brewery_11-6-2010 from Jesse A on Vimeo.
Camera GPS Embedded Video
Just so you know that GPS only works at the moment when it is uploaded to the Contour website. When you use the Storyteller application you will see a map, but you will not see this data using other video editors or uploading to other web based video site like Vimeo or Youtube.
The upload to the Contour website took a very long time even with a very short or small sized video clip.
Here is an example (Also I cannot embed the video to this blog like I can with Youtube or Vimeo)
Contour Community Video Example
Contour Vented Helmet Mount
Even before I purchased the vented helmet mount I read statements from other users that there is a lot of camera movement. On my first test ride I would estimate that 90% of the ride footage was not usable because there was so much movement and vibration. While riding on the semi-smooth pavement I could feel it as if it felt like it was flopping around, but when I checked the straps at mid ride they were as tight as I could get them. I could still move the camera with my fingers or shift the helmet in my hand and see the camera rock back and forth. The two straps locked down tight, the small mount surface area and the fact that the mount is flat and most helmets are roundish does not make for a stable mount.
The ideas below have not been field tested, but I can tell by using my hands and shaking the helmet with the camera attached that it is much more stable. The drawback to doing this is having to put a self-adhesive velcro strip on a quality helmet. In my case I had an older back up helmet that I could use. I did not want to do this on my costly Giro helmet. As a designer by trade if it were me I would have made the plastic mount base a little larger to give it more surface to surface contact area and put some arc to the bottom of the base, but since helmets come in various shapes this may not work as well. The two straps are simply not enough to hold the camera stable.
Vented Helmet Mount Solution

Self-adhesive Velcro strip applied to the helmet


Self-adhesive strip applied to the front and back of the mount
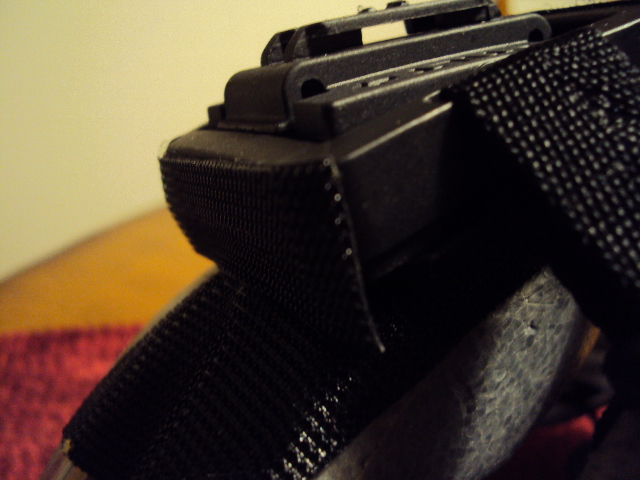

Velcro used on the front and back of the mount for extra stability
(I left the adhesive cover to help give contrast in the photo, but
I will use a non-adhesive strip for the front and back)

No comments:
Post a Comment